Rabu, 07 Januari 2009

Double Figure Eight

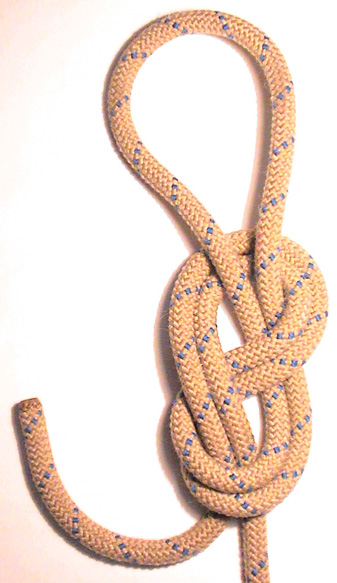
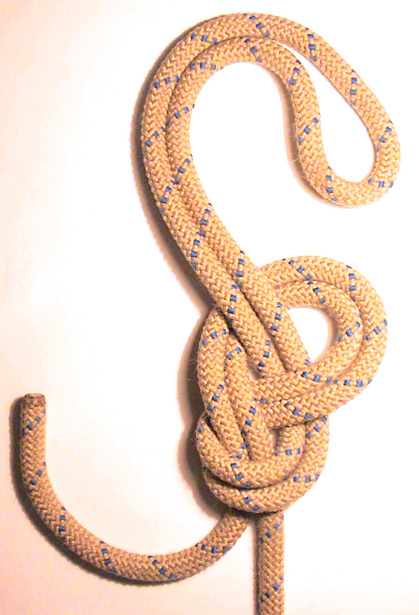
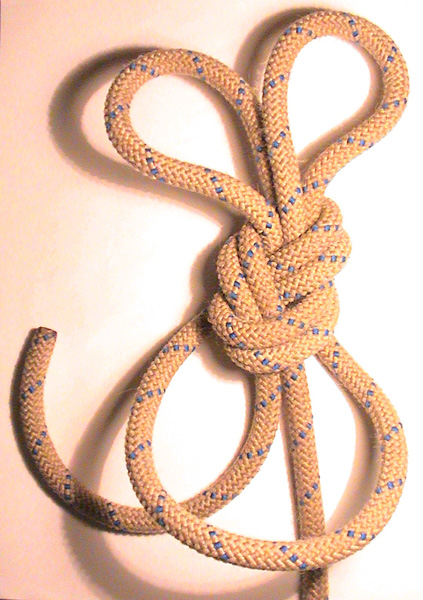
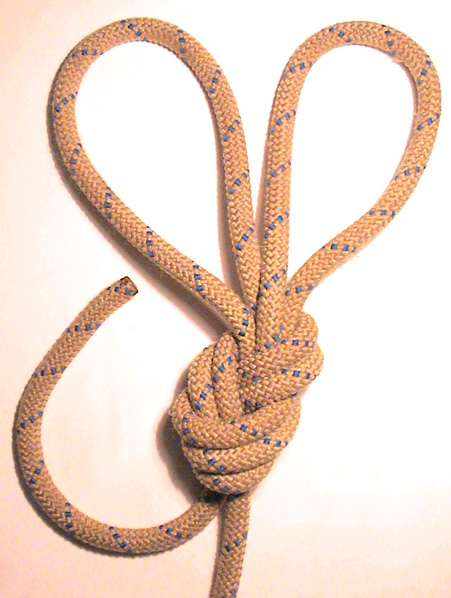
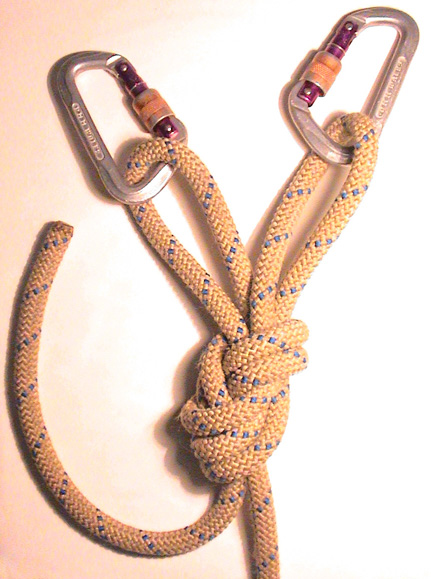
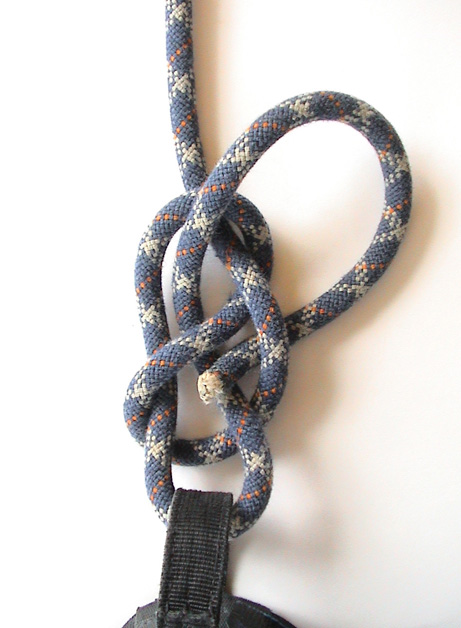
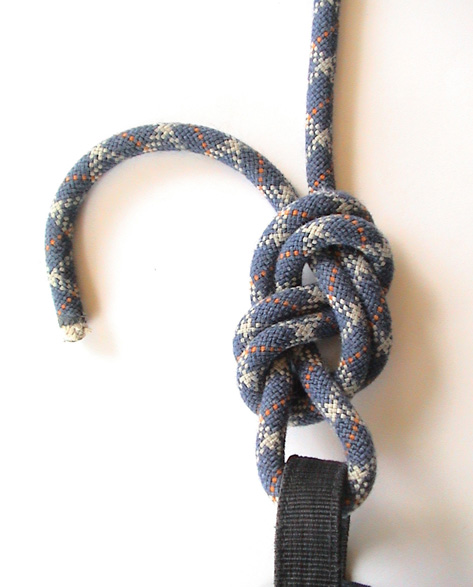
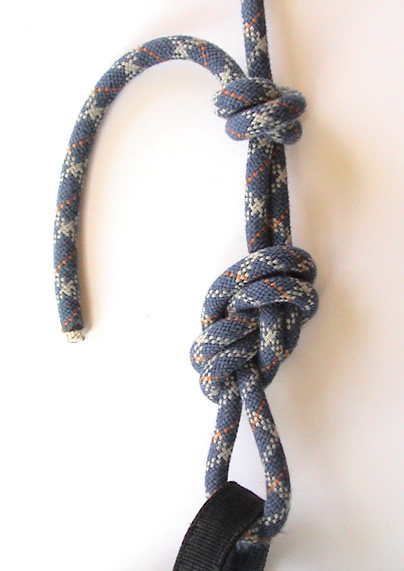
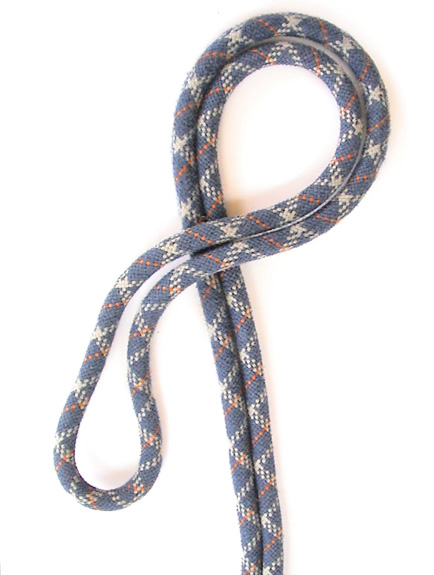
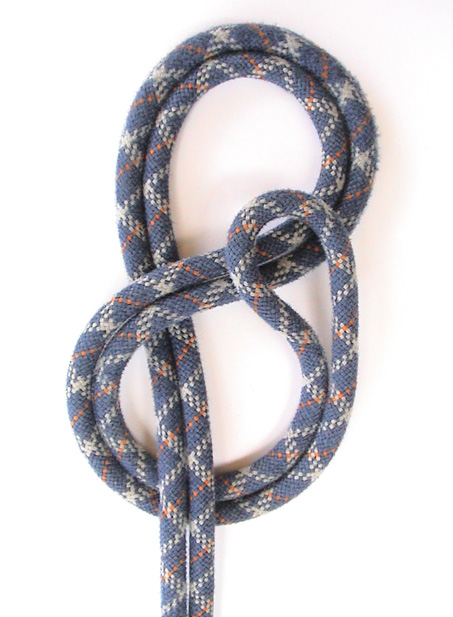
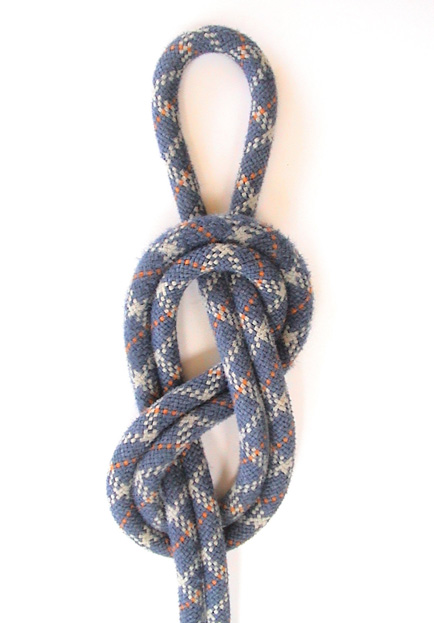
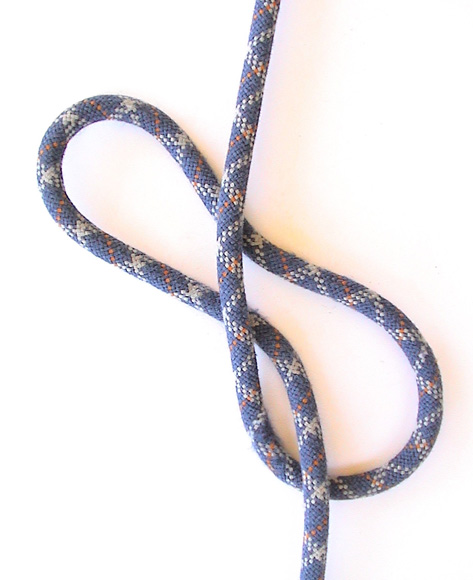
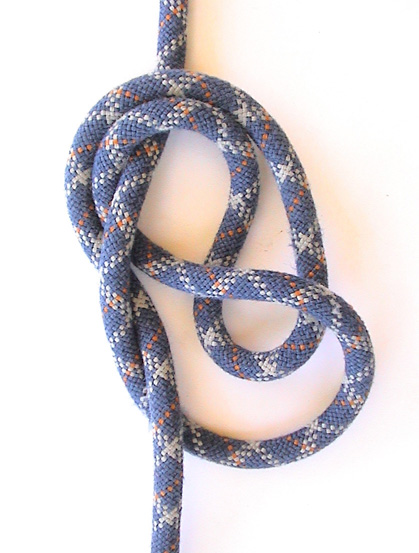
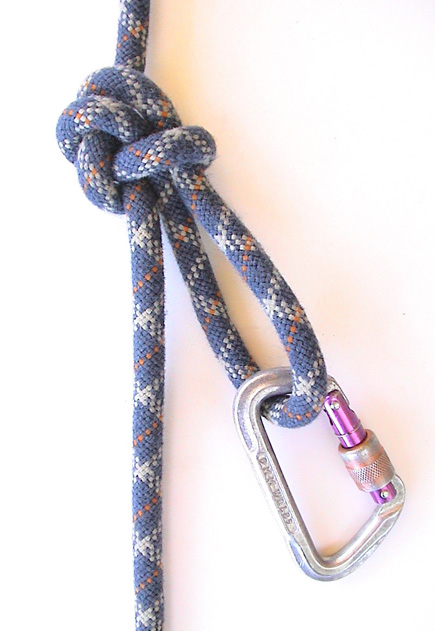
The double figure eight, also known as the "Bunny Ears", is handy when equalising two anchors using the rope. Many top ropers are fond of this knot. The "ears" can be elongated or shrunk with a little adjustment making equalisation of the load fairly simple. Follow these steps to tie the double figure eight:

Bunny Ears, Step 1Bunny Ears, Step 2Bunny Ears, Step 3
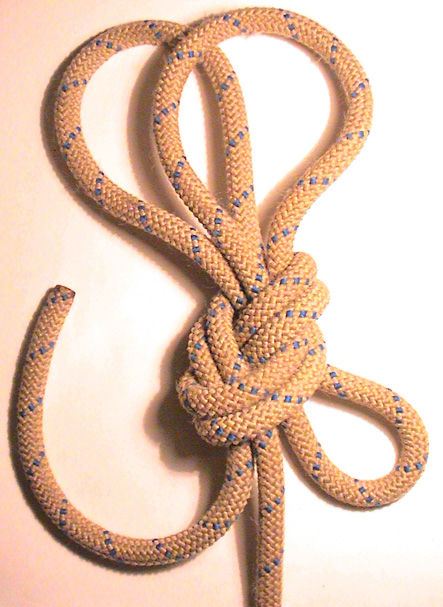
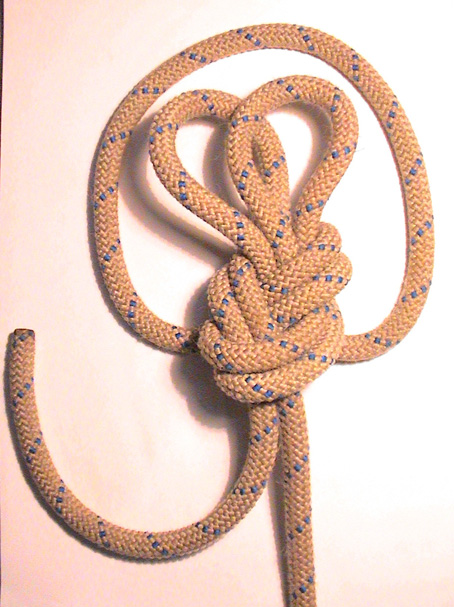
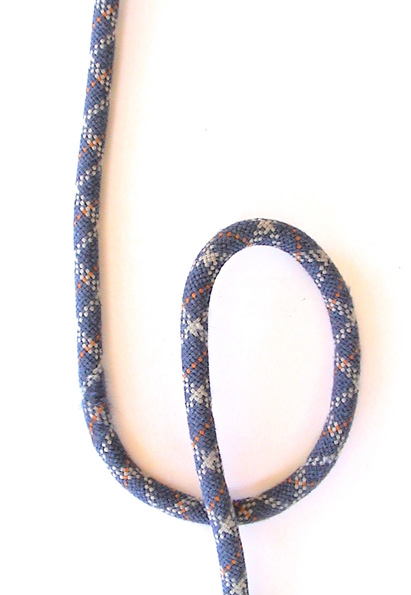
Step 1: Start with a figure eight on a bite in the end of the rope. Use a generous bite, way more than pictured, leaving a large loop sticking out the top. Step2: Feed this large loop back into the figure eight. Steps 3, 4 & 5: Continue feeding the large loop through. Not too much though, so as to leave the twin "ears" behind. Now tuck the large loop upwards, under the knot and finally over and around the twin "ears".
Bunny Ears, Step 4Bunny Ears, Step 5Bunny Ears, Step 6
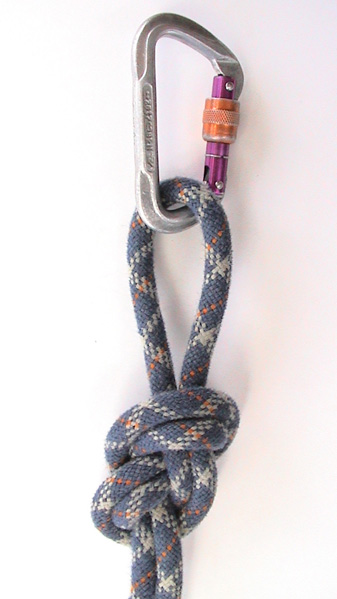
Steps 6 & 7: Pull the "ears" tight, and clip each on to your anchors. You can now adjust the tension, equalising the anchors by elongating one ear, and thus shrinking the other ear.
Bunny Ears, Step 7

sumber : http://www.chockstone.org/TechTips/BunnyEars.htm


Read more »

Figure Eight Knots

Figure Eight Follow Through

If you are a beginner climber and can only remember one knot, let it be this one. I'd be very surprised if any climber did not know this knot. Among other uses, it's very popular as a "tie in" for attaching the climbing rope to your harness. With that in mind, follow these steps to "tie in" with the Figure Eight knot:
Step 1 (Click To Enlarge)Step 2 (Click To Enlarge)Step 3 (Click To Enlarge)Step 4 (Click To Enlarge)
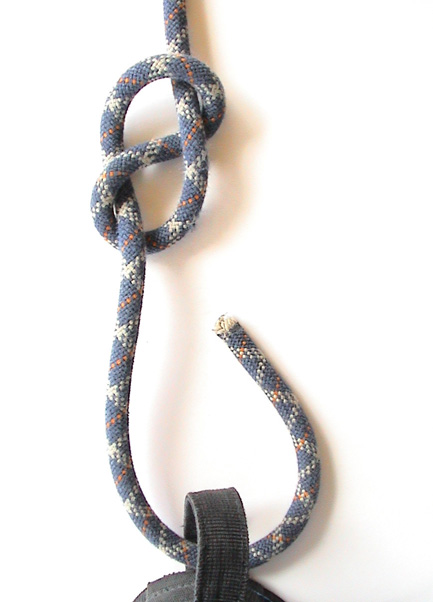
Step 1: Form a single figure eight in the end of the rope and feed the tail through your harness. Some harnesses require that you feed the rope through certain straps. When tying in, I like to feed rope through the same harness straps that the belay loop occupies (not pictured), others prefer to use the belay loop (as pictured). Still others prefer to tie into a steel locking carabiner, or two aluminium locking carabiners, gates reversed, which have been clipped into the appropriate harness straps. There are pros & cons. Consult your harness manual for the recommended tie in point.

Steps 2 & 3: Rethread the figure eight, following the same path as the first. Pull the knot tight (though some climbers prefer to leave it a little loose to absorb force from a fall). Make sure you have enough tail, as the knot will slip a bit when loaded. Check the knot by counting "two", "two" & "two", for the three visible doubled strands. Ensure they each are lying flat and not crossing over themselves.

Step 4: An optional step. If you find yourself with too much tail, or are paranoid about the figure eight slipping, tie a stopper knot with the remaining tail.

It is recommended that you check your partner's tie in knot, and get them to check yours before climbing.


Figure Eight On A Bight

This knot is formed from a "bight" of rope. It's very handy to just grab a bight of the rope anywhere along it and tie it off in this manner. Useful for belay set ups, or rescue work, or to backup ascending a rope, and all sorts of applications. Again, I'd be very surprised if any climber did not already know this knot. Never-the-less, follow these steps to tie a figure eight on a bight:
Step 1 (Click To Enlarge)Step 2 (Click To Enlarge)Step 3 (Click To Enlarge)Step 4 (Click To Enlarge)
Steps 1,2 & 3: Grab a bite of rope and form the classic figure eight. Step 4: Pull tight and clip in. Fast, simple and secure.


In-line Figure Eight

This knot can be used to anchor the rope. It's perhaps not as commonly used as the aforementioned, figure eight on a bite, but is very handy when equalising anchors. Follow these steps to tie the in-line figure eight knot:
Step 1 (Click To Enlarge)Step 2 (Click To Enlarge)Step 3 (Click To Enlarge)Step 4 (Click To Enlarge)
Step 1: Form a large loop in the rope. Steps 2 & 3: Elongate the loop, tucking it under and over the line and feeding it back through itself. Step 4: Pull tight and clip to load/anchor. The finished knot should be "facing" the direction of the load. You'll note that with a bit of adjustment you can elongate or shrink the protruding loop - very handy when equalising two anchors.

sumber : http://www.chockstone.org/TechTips/F8Knots.htm

Read more »

Building A Home Climbing Wall


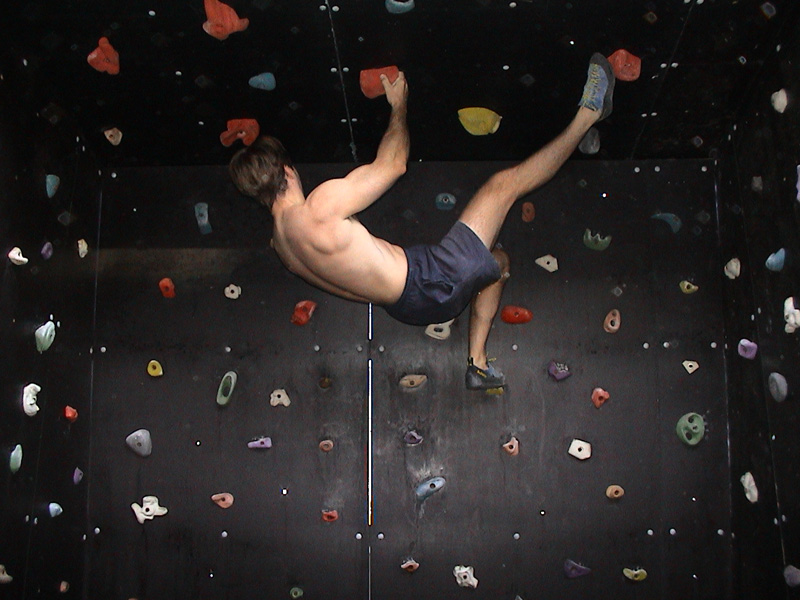
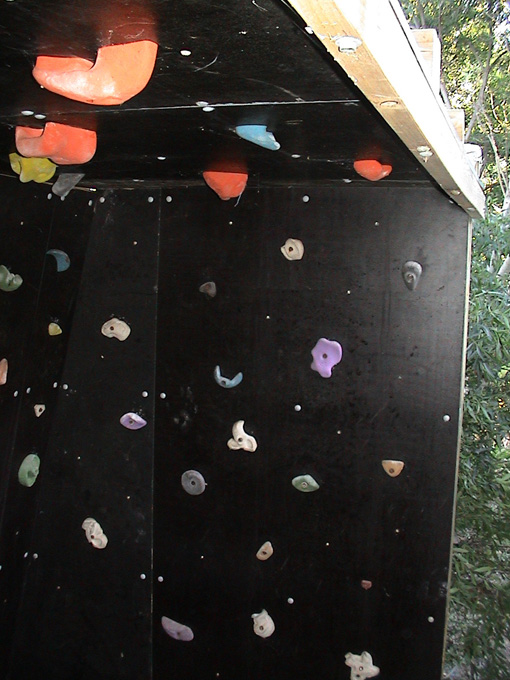
Me stuffing around on the cave roof (Click To Enlarge)
The "Woodie", or home climbing wall is a project many a climber has dreamed into existence. Late night sketches on the back of drink coasters, and avid discussions of angles, holds, size, location, and so on, has lead to many a half-hearted construction. Usually a serious attempt is only made when opportunity knocks. In my case this was gaining a friend who is a builder. He took my hastily compiled sketches, and jumble of timber and produced the result (pictured right), within a single afternoon.

My "gym" is actually a cave, being a free standing cube (approximately 3 metres tall, and wide) with a roof and an inclined rear wall. The rear wall gets the most use because its steep gradient provides a tougher workout. The whole thing is just big enough to enjoy a free flowing bouldering session rather than being reduced to merely exercising the same moves over and over.

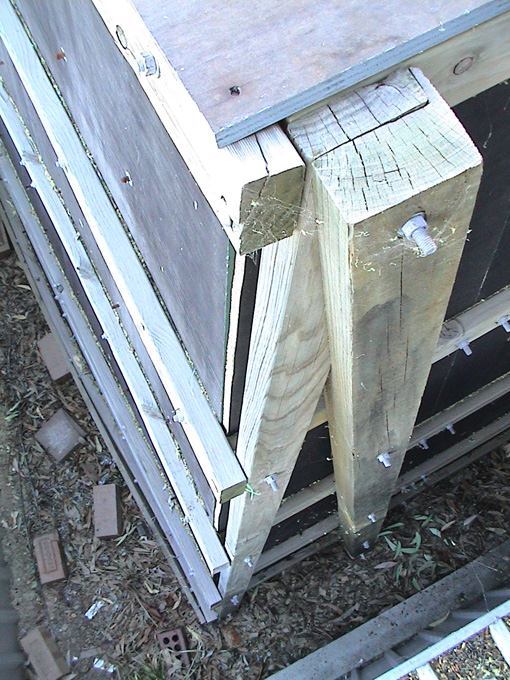
Top View (Click To Enlarge)

Above Right: Me mucking about on the roof of the cave. Left: View looking down from outside and above the cave, note the inclined rear wall recessed into the main vertical posts, which are concreted into the ground.Holds bolted on with T-nuts

The cave is outside, and thus incurs the full sun and rain. To battle this problem we used treated pine for the load bearing structure, galvanised bolts, and those black panels for the walls are the water proof, super strong "marine board" sheets they put behind concrete walls. Whilst they are quite expensive they can take a real beating.

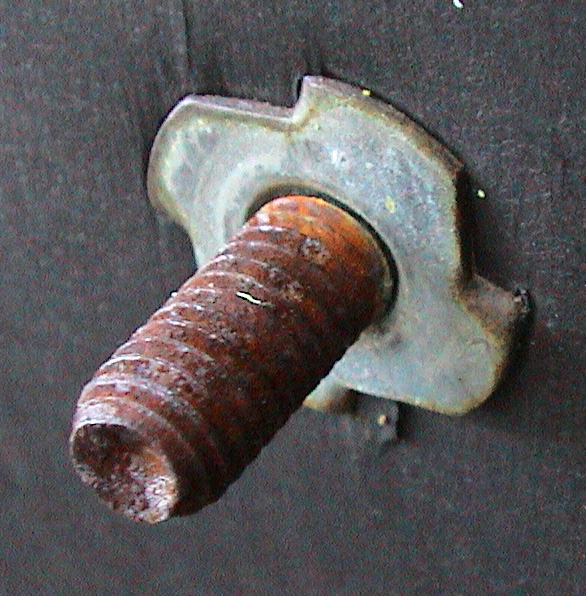
The holds are secured with T-nuts (pictured right) allowing me to move them at will from inside the cave. After a few seasons the bolts have become rusted making removal difficult, even though I used the expensive coated ones. If I was setting it up again, I'd just use cheap ordinary bolts with washers since access to the outside of the cave is easy and I don't shift the holds very often. (Click To Enlarge)

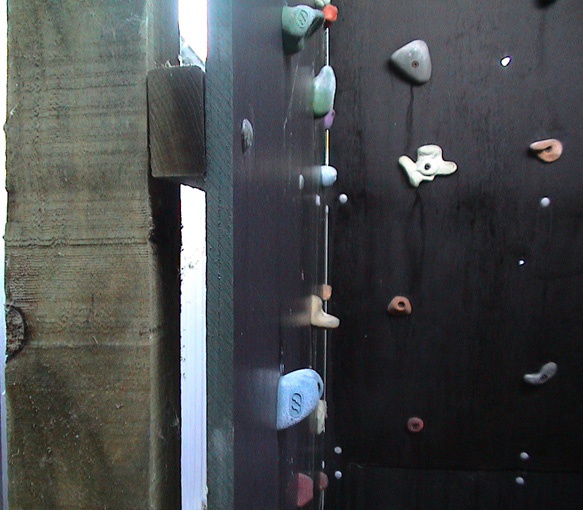
I picked up the holds at a bargain price from our local hold manufacturer because they were the "seconds" and unwanted ones from larger batches. A quick sanding with some emery paper to remove the excess resin and they're fine. The smallest footholds are about the size of a 10 cent piece and cost almost as much, then they range up to the larger roof jugs which I got for about $4 (AUD) each. If you're in the market for cheap holds, another source is the local climbing gym, who sometimes replace theirs with newer ones.(Click To Enlarge)

On the ground beneath the cave I've laid down wood chips, like they do at children's playgrounds. I've found this sufficient to cushion a fall, and less hassle than dragging an old mattress out every time I want to climb. Which brings me to another point; location. If you're looking to build a home wall, pick a location that is sheltered and easy to access. Believe it or not, but the novelty of having your own wall wears off pretty quick so the more comfortable and inviting you make it, the more likely you'll be to use it.

Size is another major consideration. My cave is just tall enough (over 3 metres on inclined wall), so that a bum start yields about four moves to the roof. Or about a dozen or so moves to traverse the three walls of the cave. If I was setting it up again, I'd make the incline wall steeper, more like 35, even 45 degrees. Or I'd look into an adjustable wall. The less wall surface you have the more of a workout you'll want to pack into that small space. A steep wall provides a pump. I've used a set of small crimps to increase difficulty, but I'd prefer more gradient.

Here's the sketches I drew up originally. We probably didn't stick to the plan completely, but it should give you an idea of the dimensions and timber required.

4 vertical posts - 3.6 m / 100mm x 100mm treated pine.
Horizontal slats - 70mm x 35mm treated pine.
2 posts at 15 degrees angle - 3.6 m / 100mm x 50mm treated pine.
All components secured in place with galvanised bolts.
Marine Board Sheets bolted to slats.
Numerous climbing holds bolted to board in a random pattern.
Marine Board on roof as well, and covered with corrugated roofing iron to protect from rain.


Of course a home climbing wall need not be as elaborate as the one shown above. The simplest ones I've heard described are bolting holds into an existing children's tree house, and one guy who claimed he bolted holds onto a dead tree - not sure how successful that was! A friend of mine has a single sheet of plywood with a metal frame, attached to chains dyna-bolted into an existing brick wall. He can vary the angle of the frame by moving up or down the chain links. The thing flexes a fair bit, but it works. Follow the links below to see more ideas from other web sites. Alternatively there are books available that go into the whole process of planning, construction, route setting and training systems in detail.

sumber : http://www.chockstone.org/TechTips.htm


Read more »

Motorola Bikin Ponsel dari Botol Plastik Bekas


W233 (chicagotribune)

Motorola mempersiapkan sebuah ponsel ramah lingkungan. Ponsel yang akan dipamerkan di ajang Consumer Electronics Show ini terbuat dari botol plastik daur ulang.

Ponsel Moto W233 Renew ini diklaim sebagai ponsel netral karbon pertama dunia, karena terbuat dari bahan plastik daur ulang.

Supaya lebih ramah lingkungan, Renew akan hadir dengan kotak berukuran lebih kecil, beserta brosur yang dicetak pada kertas daur ulang dengan tinta berbahan dasar sayuran.


Motorola belum bersedia mengungkapkan secara detail harga dan spesifikasi ponsel Moto W233 Rene. Namun, disebutkan bahwa ponsel ini memiliki waktu bicara selama sembilan jam. Walhasil, ponsel ini tidak perlu sering diisi ulang dan lebih hemat energi.

Untuk memperkuat kesan 'hijau' ponsel ini ditampilkan dalam balutan warna kuning agak kehijau-hijauan.

Selain menampilkan Ponsel Moto W233 Renew, Motorola juga mengusung ponsel Motosurf A3100, yang disebut sebagai "touch tablet", untuk akses data via HSPA dan koneksi Wi-Fi, dan berjalan dengan software Windows Mobile 6.1. Ponsel tersebut akan menyambangi Asia dan Amerika Latin kuartal pertama ini.

Ponsel lainnya yang juga akan dipamerkan Motorola yakni Motorola Tundra VA76r yang berjalan dengan jaringan AT&T. Setali tiga uang dengan Moto W233 Renew, detail kedua ponsel ini juga belum diungkap secara gamblang, demikian seperti dikutip dari Computerworld, Rabu (7/1/2009).

Masih ada produk lain yang diboyong Motorola dalam ajang tersebut, misalnya remote TV yang dapat diisi ulang dan memiliki fitur yang memungkinkan user menemukan remote saat hilang.

Motorola ingin serius mengembangkan produk ramah lingkungan. Keseriusan ini ditunjukkan dengan dikembangkannya standar "green design" untuk mempelajari dampak lingkungan dari produknya.


Read more »

Selasa, 06 Januari 2009

Google Android Sambangi Netbook?


Ponsel Google (sfgate)

Persaingan Google dan Microsoft barangkali bakal merambah netbook. Beberapa analis mengemukakan kemungkinan sistem operasi Android yang saat ini baru ada untuk smartphone, bakal menyambangi netbook. Jika terlaksana, berarti Google menantang Microsoft yang saat ini cukup dominan di pasaran sistem operasi netbook.

Wacana tersebut mengemuka setelah programmer di Amerika Serikat mengklaim mampu menautkan software Android pada netbook Asus Eee PC. Mereka mengaku hanya butuh waktu 4 jam untuk melakukannya.


Programmer bernama Krzykowski dan Daniel Hartmann ini memaparkan via blognya bahwa Android cukup stabil dan punya kapabilitas yang cukup untuk menjadi sistem operasi netbook.

Meski demikian, prospek Android menjadi sistem operasi yang umum di netbook masih penuh jalan terjal. Sebab sampai kini, baik perusahaan komputer besar dan juga pihak Google sendiri belum mempertimbangkan kemungkinan ini.

Terlebih diakui oleh duet programmer itu, Android juga punya kekurangan berbagai fitur penting, misalnya akselerasi grafis 3D. Hal ini bisa dimaklumi karena Android memang didesain untuk smartphone bukan netbook.

Akan tetapi selalu ada kemungkinan Google dan grup pengembang Android, Open Handset Alliance suatu saat membesut Android khusus netbook.Langkah ini dinilai potensial untuk menggerus lahan Windows XP besutan Microsoft di pasaran netbook.
Read more »

 
Cheap Web Hosting | Top Web Hosts | Great HTML Templates from easytemplates.com.